How to build, test and run
This page explains how to install the tools you need to run OpenRefine from source and develop. This consists of:
- A Unix/Linux shell environment or the Windows command line, that should be installed on your machine already;
- OpenRefine's source code;
- a Java Development Kit (JDK) (version 11 or later);
- Apache Maven;
- Node.js and NPM (version 20 or later).
Get OpenRefine's source code
With Git installed, use the git clone command to download the project's repo to a directory of your choice.
Set up JDK
You must install JDK and set the JAVA_HOME environment variable (please ensure it points to the JDK, and not the JRE).
OpenRefine is known to work with Java 11 to 21.
- Windows
- Mac
- Linux
- On Windows 10, click the Start Menu button, type
env, and look at the search results. Click . (If you are using an earlier version of Windows, use the “Search” or “Search programs and files” box in the Start Menu.)

- Click at the bottom of the Advanced window.
- In the Environment Variables window that appears, click and create a variable with the key
JAVA_HOME. You can set the variable for only your user account, as in the screenshot below, or set it as a system variable - it will work either way.

- Set the
Valueto the folder where you installed JDK, in the formatD:\Programs\OpenJDK. You can locate this folder with the button.
First, install Java. You can do so either with Homebrew, with brew install java, or by downloading it from Adoptium and installing it manually.
You then need to make sure the JAVA_HOME environment is properly set, so that OpenRefine can find your Java install.
Check the environment variable JAVA_HOME with:
$JAVA_HOME/bin/java --version
If this shows your Java version, your JAVA_HOME variable is set up correctly. If it shows an error, you need to adjust it.
To do so, you can use:
export JAVA_HOME="$(/usr/libexec/java_home)"
Or, for Java 13.x:
export JAVA_HOME="$(/usr/libexec/java_home -v 13)"
On Debian/Ubuntu derivatives, enter the following:
sudo apt install default-jdk
On Fedora/CentOS, use:
sudo dnf install java-devel
On ArchLinux, use:
sudo pacman -S jdk-openjdk
For other distributions, search for any JDK in your package repository: most should be compatible with OpenRefine.
Maven
OpenRefine development requires Apache Maven for its build, test, and packaging processing. We encourage using the latest version of Apache Maven for development of OpenRefine, otherwise sometimes spurious errors appear in your IDE regarding POM, dependencies, or packages.
- Windows
- Mac
- Linux
Install Maven. Then ensure the M2_HOME or MAVEN_HOME environment variable is set or 'mvn' is in your system PATH:
MAVEN_HOME=E:\Downloads\apache-maven-3.8.4-bin\apache-maven-3.8.4\
Install Maven via Homebrew with brew install maven.
Otherwise, Install Maven. Then ensure the M2_HOME or MAVEN_HOME environment variable is set or 'mvn' is in your system PATH:
MAVEN_HOME=/opt/apache-maven-3.8.7
Install Maven with the package manager of your Linux distribution. For instance:
- On Debian/Ubuntu derivatives, use
sudo apt install maven - On Fedora/CentOS, use
sudo dnf install maven - On ArchLinux, use
sudo pacman -S maven
Other distributions are likely to offer Maven in their official package repository as well.
Node.js and npm
The OpenRefine webapp requires Node.js and npm to install package dependencies. We require Node.js 20 or newer. Download and install Node.js (On Windows, you can alternatively install nvm to easily manage multiple npm versions on your system). You should then have node and npm intalled. You can check the versions by typing:
node -v
npm -v
You can update the version of npm to the latest by typing
npm install -g npm@latest
Building
To see what functions are supported by OpenRefine's build system, type
./refine -h
To build the OpenRefine application from source type:
./refine clean
./refine build
Note that the refine script is a wrapper over the Maven build system. You can often use Maven commands directly, but running some goals in isolation might fail (try adding the compile test-compile goals in your invocation if that is the case).
Testing
Since OpenRefine is composed of two parts, a server and a in-browser UI, the testing system reflects that:
- on the server side, it's powered by TestNG and the unit tests are written in Java;
- on the client side, we use Cypress and the tests are written in Javascript
To run server tests, use:
./refine test
To run the Cypress tests for the first time, you must go through the installation process..
Then, you need to run two processes in parallel:
- OpenRefine itself, ideally running off a fresh workspace directory:
./refine -d /tmp/openrefine_workspace - Cypress, with the command
yarn --cwd ./main/tests/cypress run cypress open
We recommend running only individual test suites locally and relying on our continuous integration infrastructure to run the entire test suite, as this is rather time consuming.
Running
From the top level directory in the OpenRefine application you can build, test and run OpenRefine using the ./refine shell script (if you are working in a *nix shell), or using the refine.bat script from the Windows command line. Note that the refine.bat on Windows only supports a subset of the functionality, supported by the refine shell script. The example commands below are using the ./refine shell script, and you will need to use refine.bat if you are working from the Windows command line.
To run OpenRefine from the command line (assuming you have been able to build from the source code successfully)
./refine
By default, OpenRefine will use refine.ini for configuration. You can copy it and rename it to refine-dev.ini, which will be used for configuration instead. refine-dev.ini won't be tracked by Git, so feel free to put your custom configurations into it.
If you wish to run the application manually, without using the refine script, you can do so via Maven with mvn exec:java. The entry point of the application is the com.google.refine.Refine class.
Building distributions (packaged versions)
The Refine build system uses Apache Maven to automate the creation of the installation packages for the different operating systems. The packages are currently optimized to run on Mac OS X which is the only platform capable of creating the packages for all three OS that we support.
To build the distributions type
./refine dist <version>
where 'version' is the release version.
Developing with Eclipse
OpenRefine' source comes with Maven configuration files which are recognized by Eclipse if the Eclipse Maven plugin (m2e) is installed.
At the command line, go to a directory not under your Eclipse workspace directory and check out the source:
git clone https://github.com/OpenRefine/OpenRefine.git
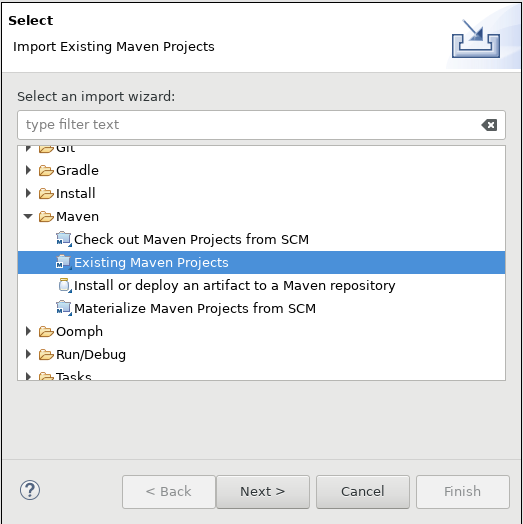
In Eclipse, invoke the Import... command and select Existing Maven Projects.
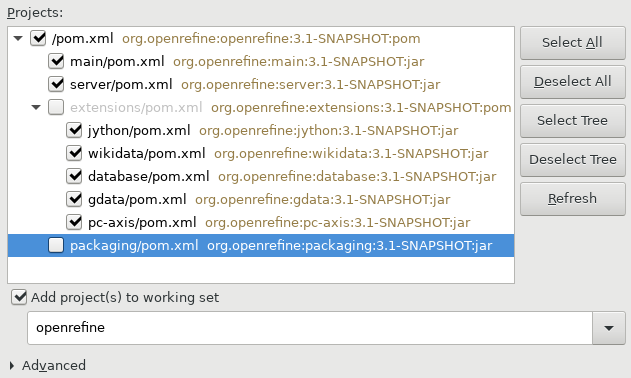
Choose the root directory of your clone of the repository. You get to choose which modules of the project will be imported. You can safely leave out the packaging module which is only used to generate the Linux, Windows and MacOS distributions.
To run and debug OpenRefine from Eclipse, you will need to add an execution configuration on the server sub-project.
Right click on the server subproject, click Run as... and Run configurations... and create a new Maven Build run configuration. Rename the run configuration OpenRefine. Enter the root directory of the project as Base directory and use exec:java as a Maven goal.
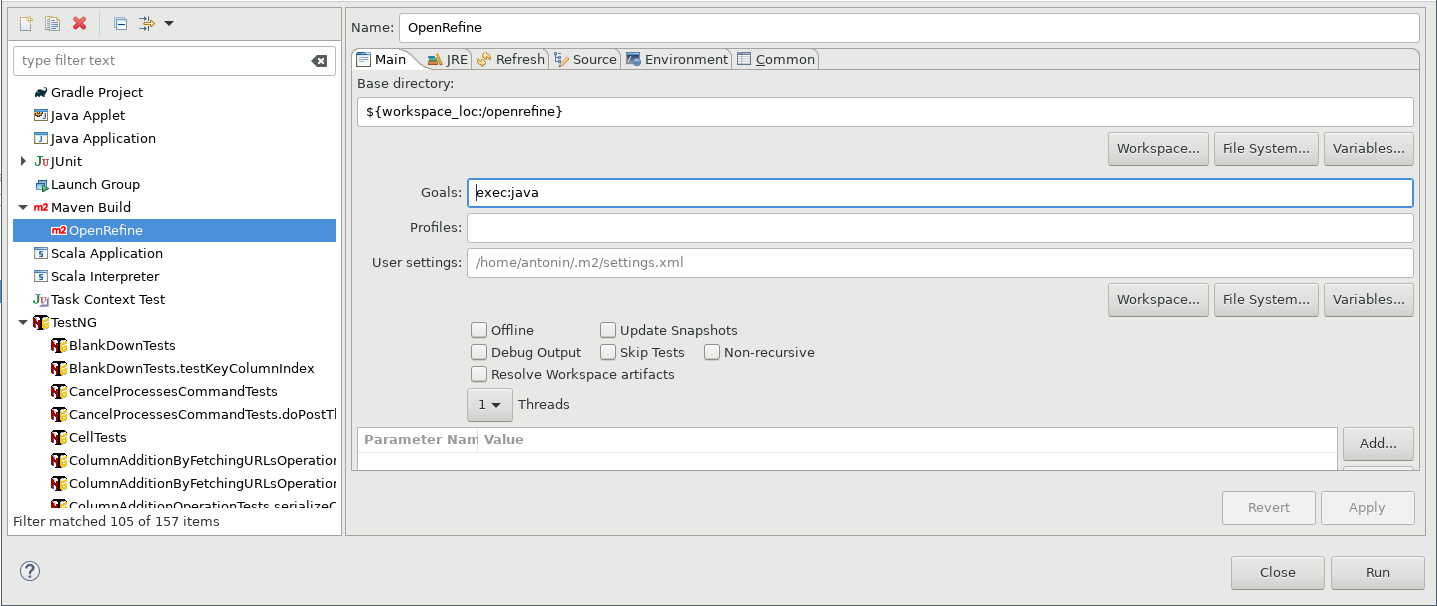
This will add a run configuration that you can then use to run OpenRefine from Eclipse.
Code style
You can apply the supplied Eclipse code style (in IDEs/eclipse/Refine.style.xml) to make sure Eclipse lints your files according to the existing style. To do so,
go to Window -> Preferences -> Java Code Style -> Formatter menu and enable a project-specific formatter that you can import from the XML file.
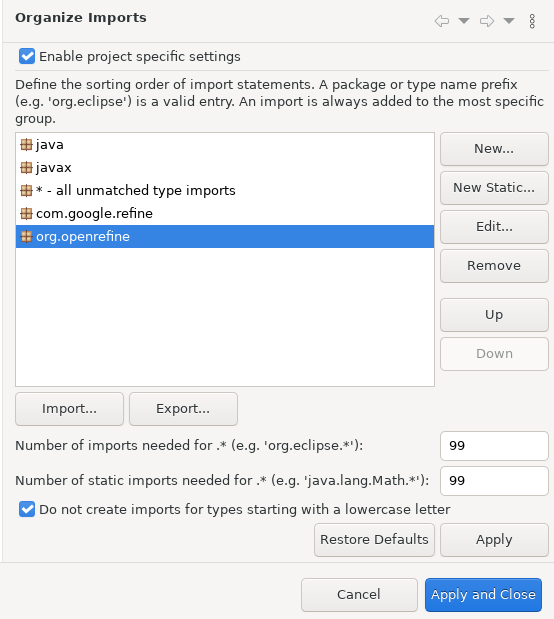
You can also configure Eclipse to sort import statements according to our conventions, by going to the Window -> Preferences -> Java -> Code Style -> Organize imports menu and enabling project-specific import order:
javajavax*com.google.refineorg.openrefine
The dialog should look as follows:
Pull requests deviating from this style will fail in the CI.
You can manually apply the code style (regardless of your IDE) with the ./refine lint command (or refine.bat lint on Windows).
Testing
You can run the server tests directly from Eclipse. To do that you need to have the TestNG launcher plugin installed, as well as the TestNG M2E plugin (for integration with Maven). If you don't have it, you can get it by installing new software from this update URL https://testng.org/doc/download.html
Once the TestNG launching plugin is installed in your Eclipse, right click on the source folder "main/tests/server/src", select Run As -> TestNG Test. This should open a new tab with the TestNG launcher running the OpenRefine tests.
Test coverage
It is possible to analyze test coverage in Eclipse with the EclEmma Java Code Coverage plugin. It will add a Coverage as… menu similar to the Run as… and Debug as… menus which will then display the covered and missed lines in the source editor.
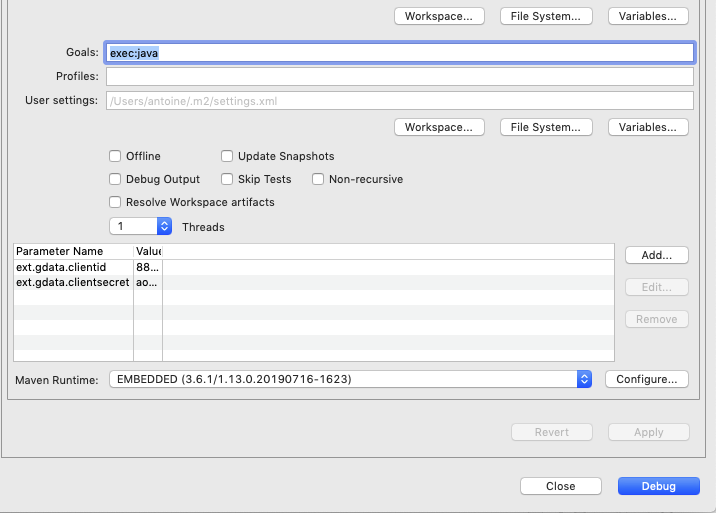
Debugging
Here's an example of putting configuration in Eclipse for debugging, like putting values for the Google Data extension. Other type of configurations that can be set are memory, Wikidata login information and more.
Developing with IntelliJ IDEA
At the command line, go to a directory you want to save the OpenRefine project and execute the following command to clone the repository:
git clone https://github.com/OpenRefine/OpenRefine.git
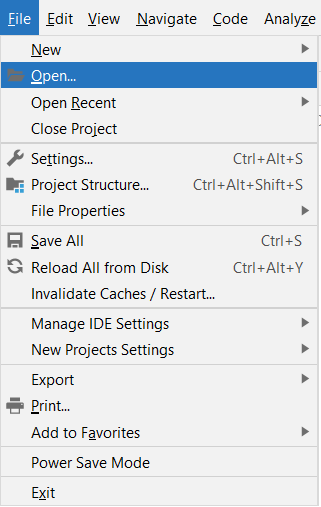
Then, open the IntelliJ idea and go to file -> open and select the location of the cloned repository.
It will prompt you to add as a maven project as the source code contains a pom.xml file in it. Allow auto-import so that it can add it as a maven project.
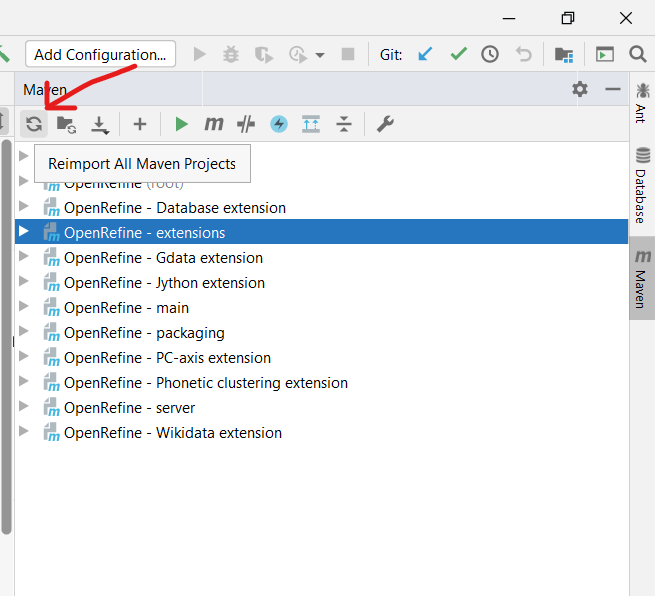
If it doesn't prompt something like this then you can go on the right side of the IDE and click on maven then, click on reimport all the maven projects that will add all the dependencies and jar files required for the project.
After this, you will be able to properly build, test, and run the OpenRefine project from the terminal. But if you will go to any of the test folders and open some file it will show you some import errors because the project isn't yet set up at the module level.
For removing those errors, and enjoying the features of the IDE like ctrl + click, etc you need to set up the project at the module level too. Open the different modules like extensions/wikidata, main as a project in the IDE. Then, right-click on the project folder and open the module settings.
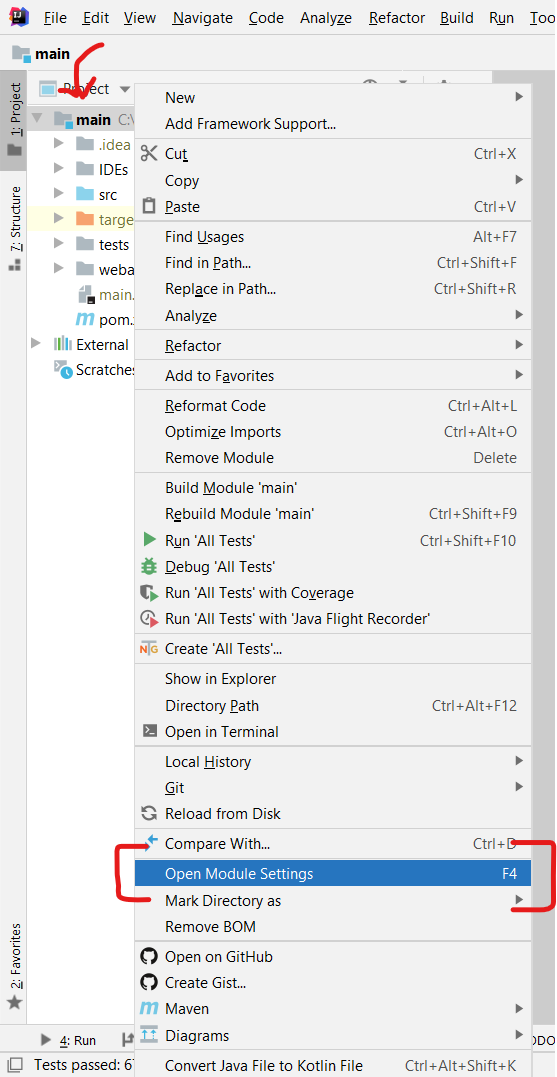
In the module settings, add the source folder and test source folders of that module.
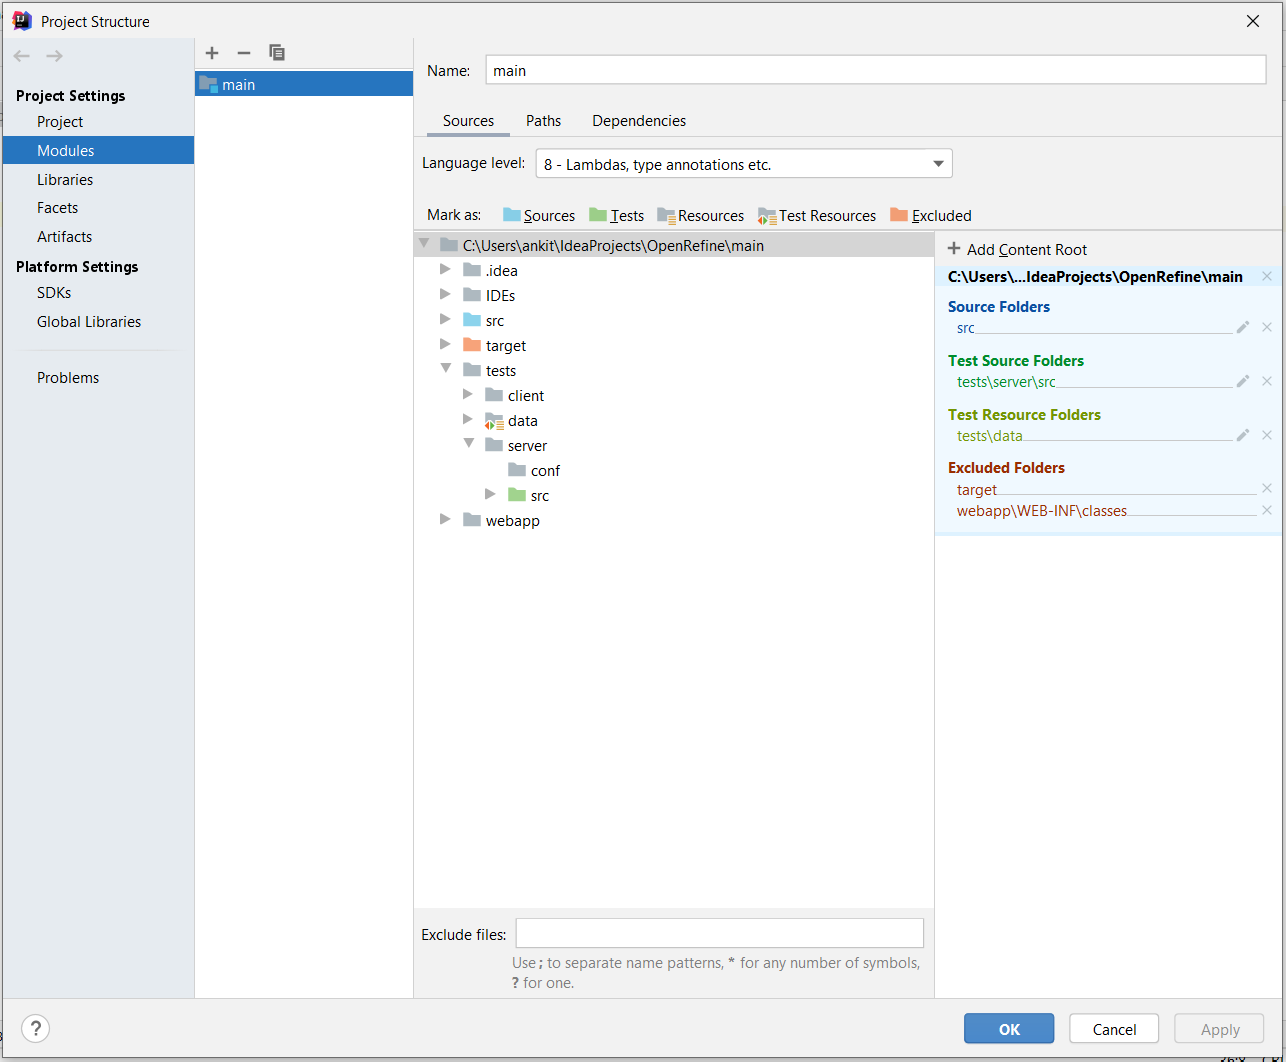
Then, do the same thing for the main OpenRefine project and now you are good to go.
Code style
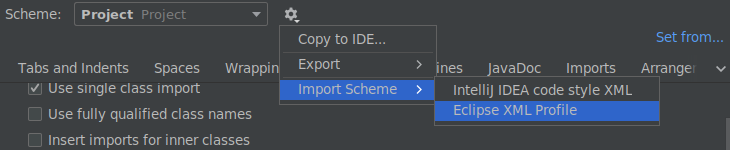
You can set up IntelliJ to follow the style conventions we use in OpenRefine, as IntelliJ is able to import Eclipse style files.
Go to Settings -> Editor -> Code style -> Java and import the style configuration file as follows:
The style file is located at IDEs/eclipse/Refine.style.xml in the repository. Note that this won't configure import ordering since this isn't included in the Eclipse code style export.
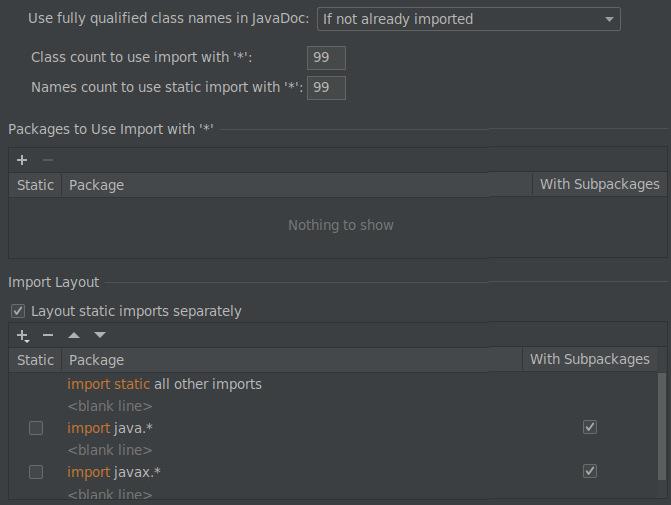
You can also configure the import order for the OpenRefine to follow the following order:
javajavax*com.google.refineorg.openrefine
And disable the use of star imports by setting the thresholds for their activation at 99.
To automatically format the code from the command-line, you can also use ./refine lint (or refine.bat lint on Windows).